Adding a Device
- 12 Apr 2023
- 1 Minute to read
- Contributors

- Print
- DarkLight
- PDF
Adding a Device
- Updated on 12 Apr 2023
- 1 Minute to read
- Contributors
- Print
- DarkLight
- PDF
Article Summary
Share feedback
Thanks for sharing your feedback!
Adding a Device
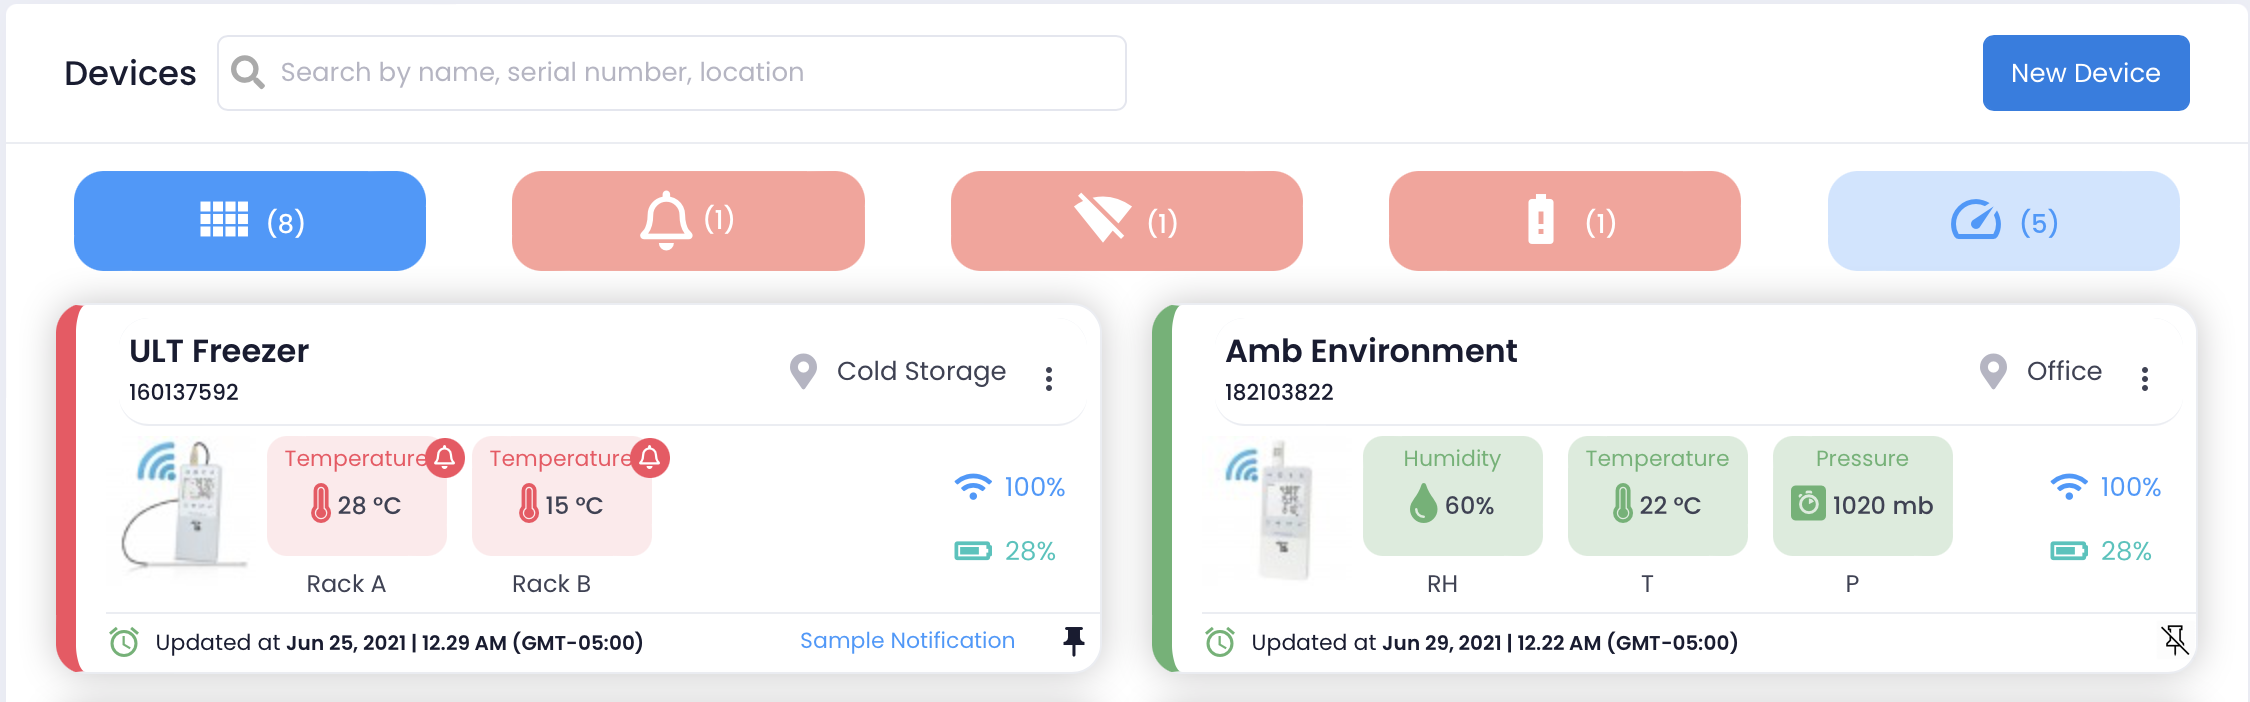
To add a new device, tap the New Device button at the top, right-hand corner of the Device List:
And you'll be taken to the Add A Device wizard.
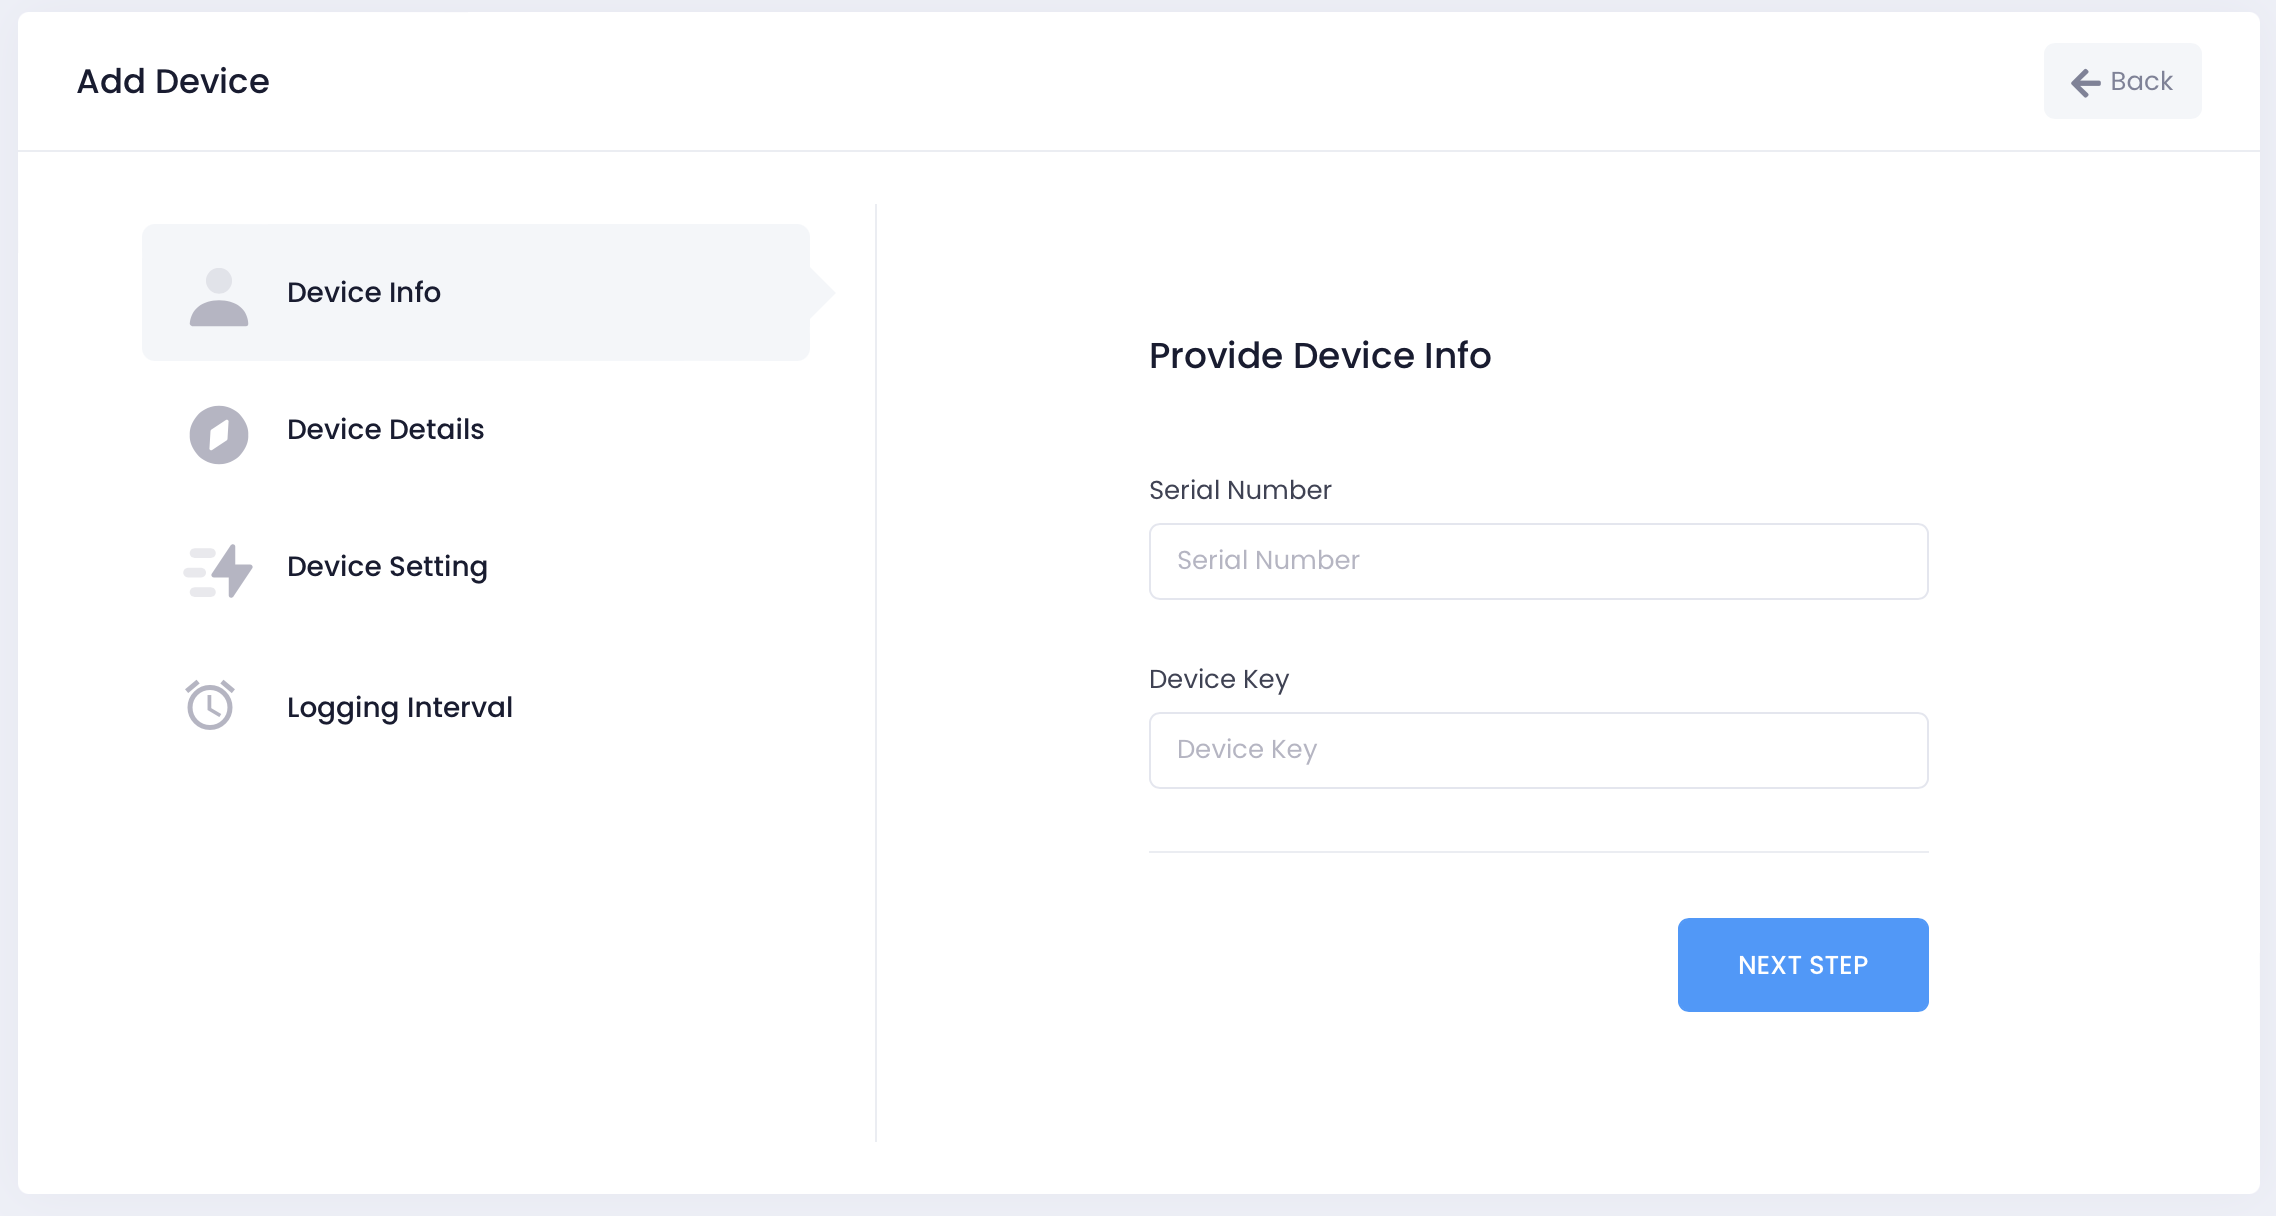
Device Validation
Quickly enter the Device Serial Number and Key and get instant, inline feedback as to the validity of the data entered. With the Serial Number and Device Key entered, tap the Next Step button to configure the new device.
NOTE
Your TraceableLIVE® Datalogger device's Serial Number and Device Key can typically be found on a label on the back of the device.
Newer TraceableLIVE® Datalogger devices also include a QR-Code sticker that can be scanned by the mobile version of the TraceableLIVE® app to quickly enter the Serial Number and Device Key.
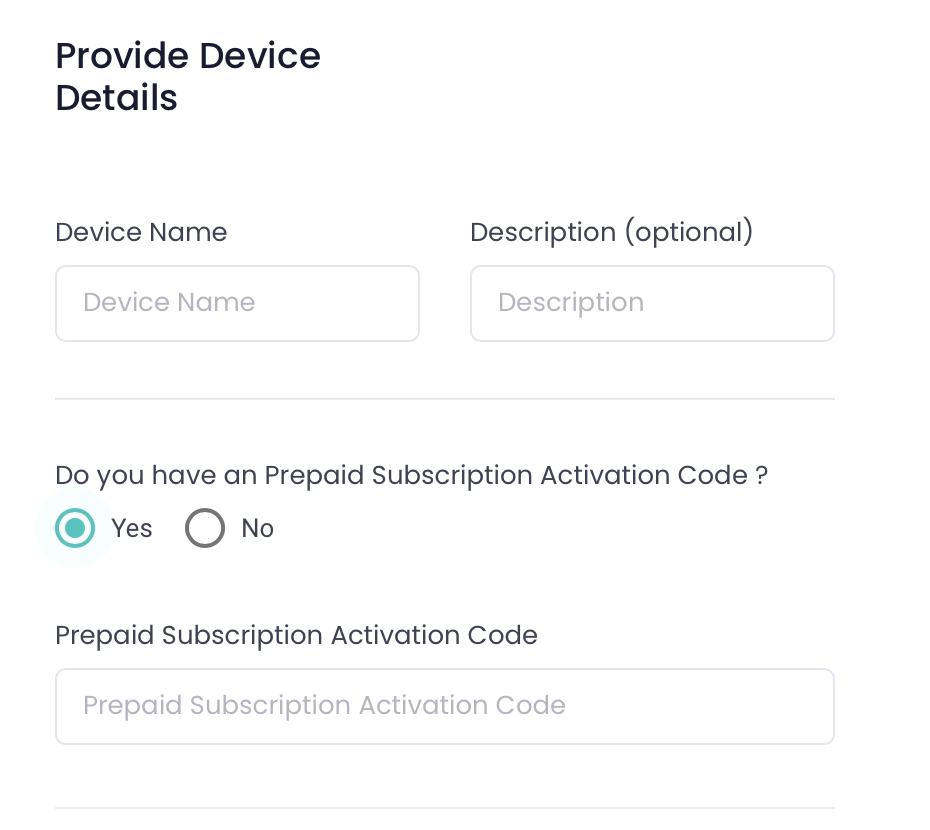
Provide Device Details
Here you will provide the required Device Name and option Description for the new device:
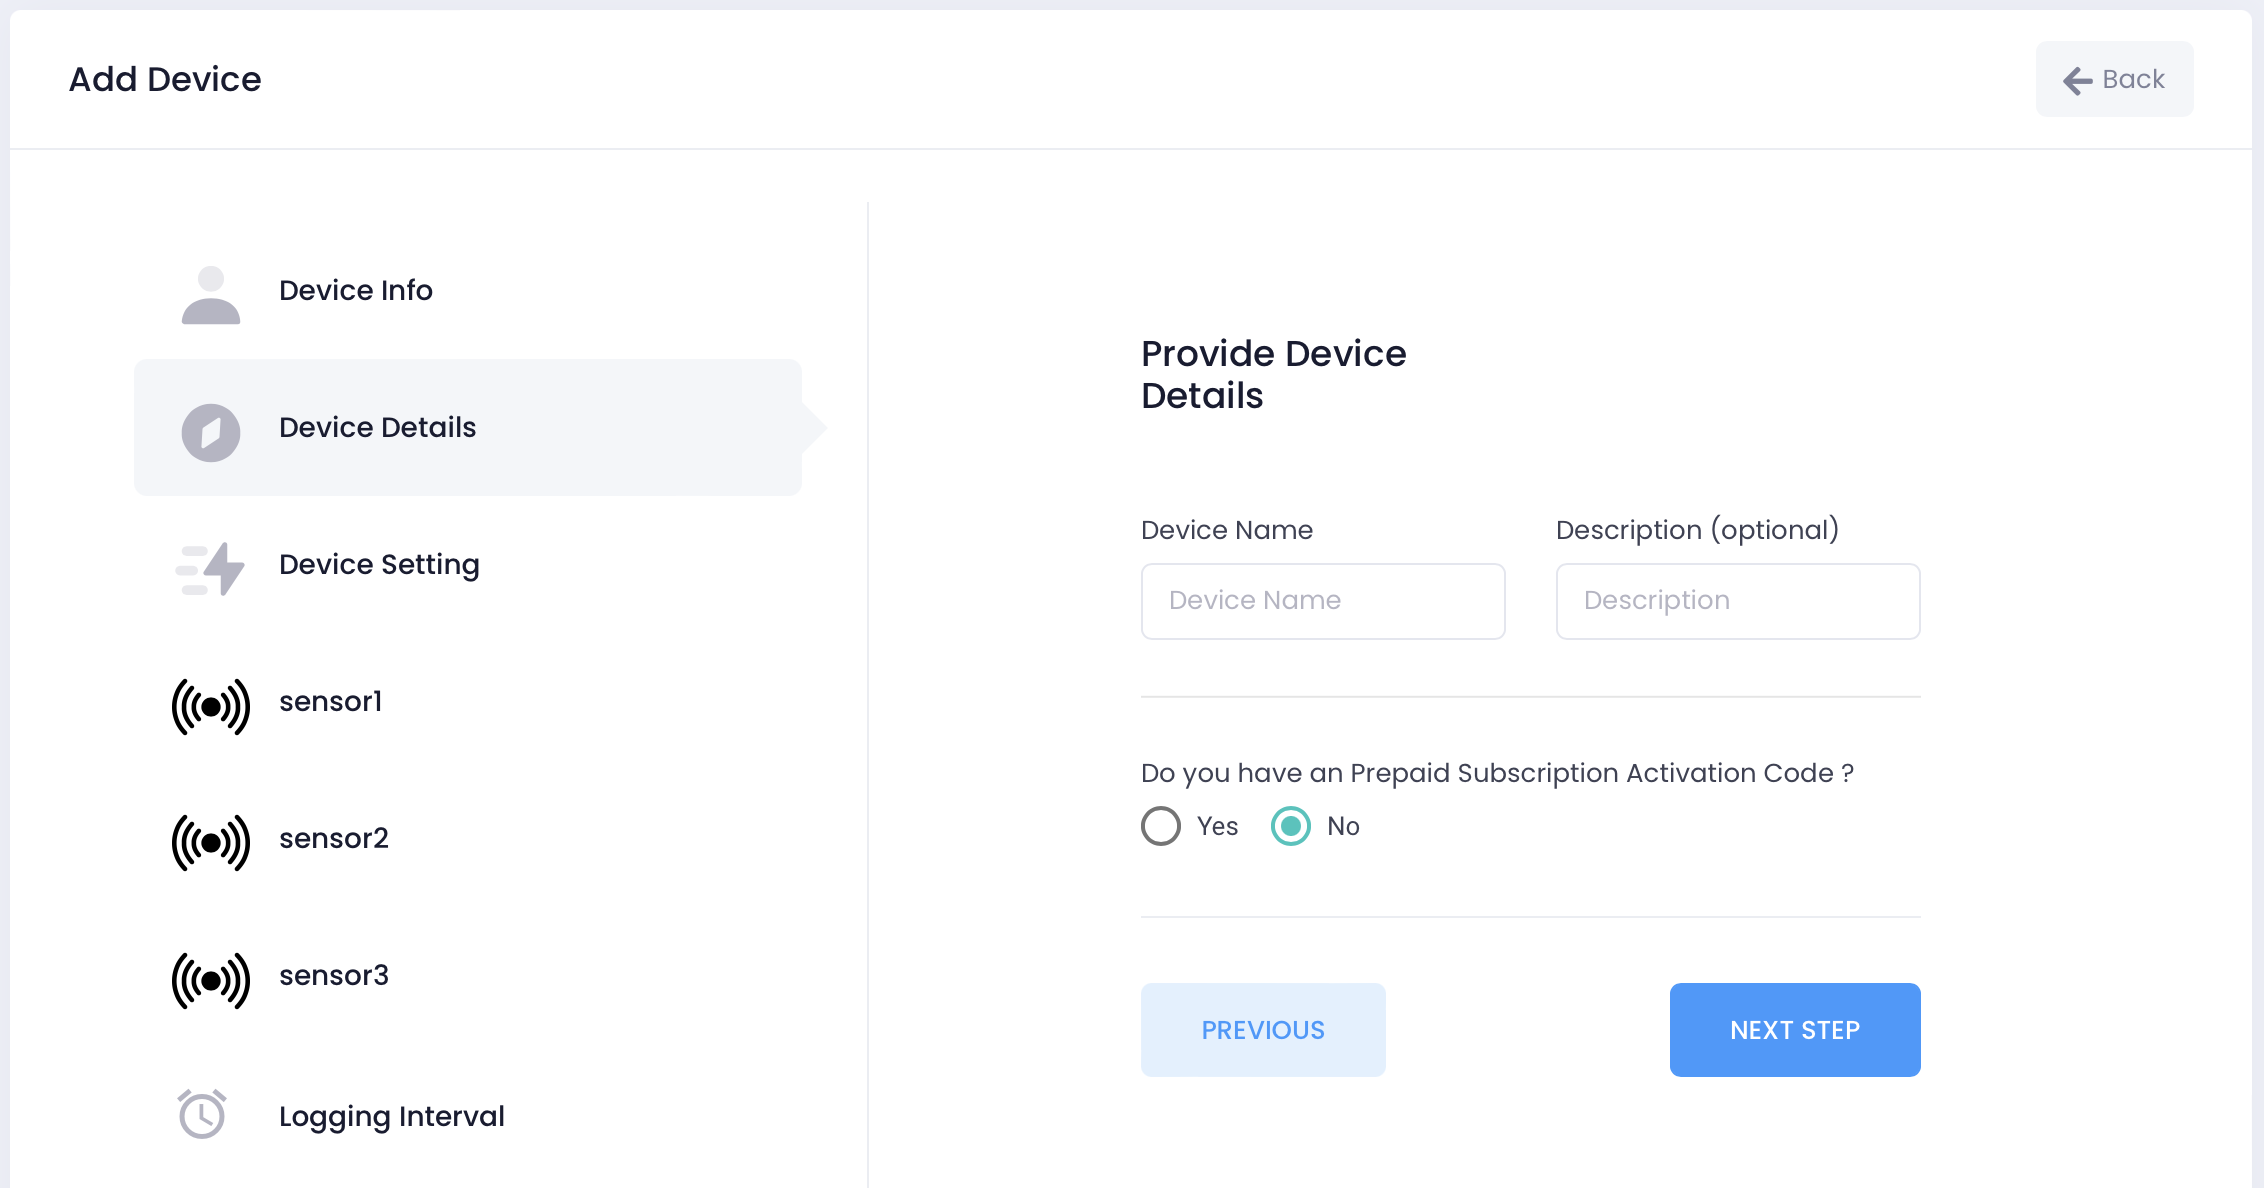
If you purchased this device with an activation code, select Yes and enter the code:
Click the Previous button to return to the previous screen or the Next Step button to enter additional device settings.
Additional Device Settings
Here you will configure the new device before adding it to your TraceableLIVE® Account:
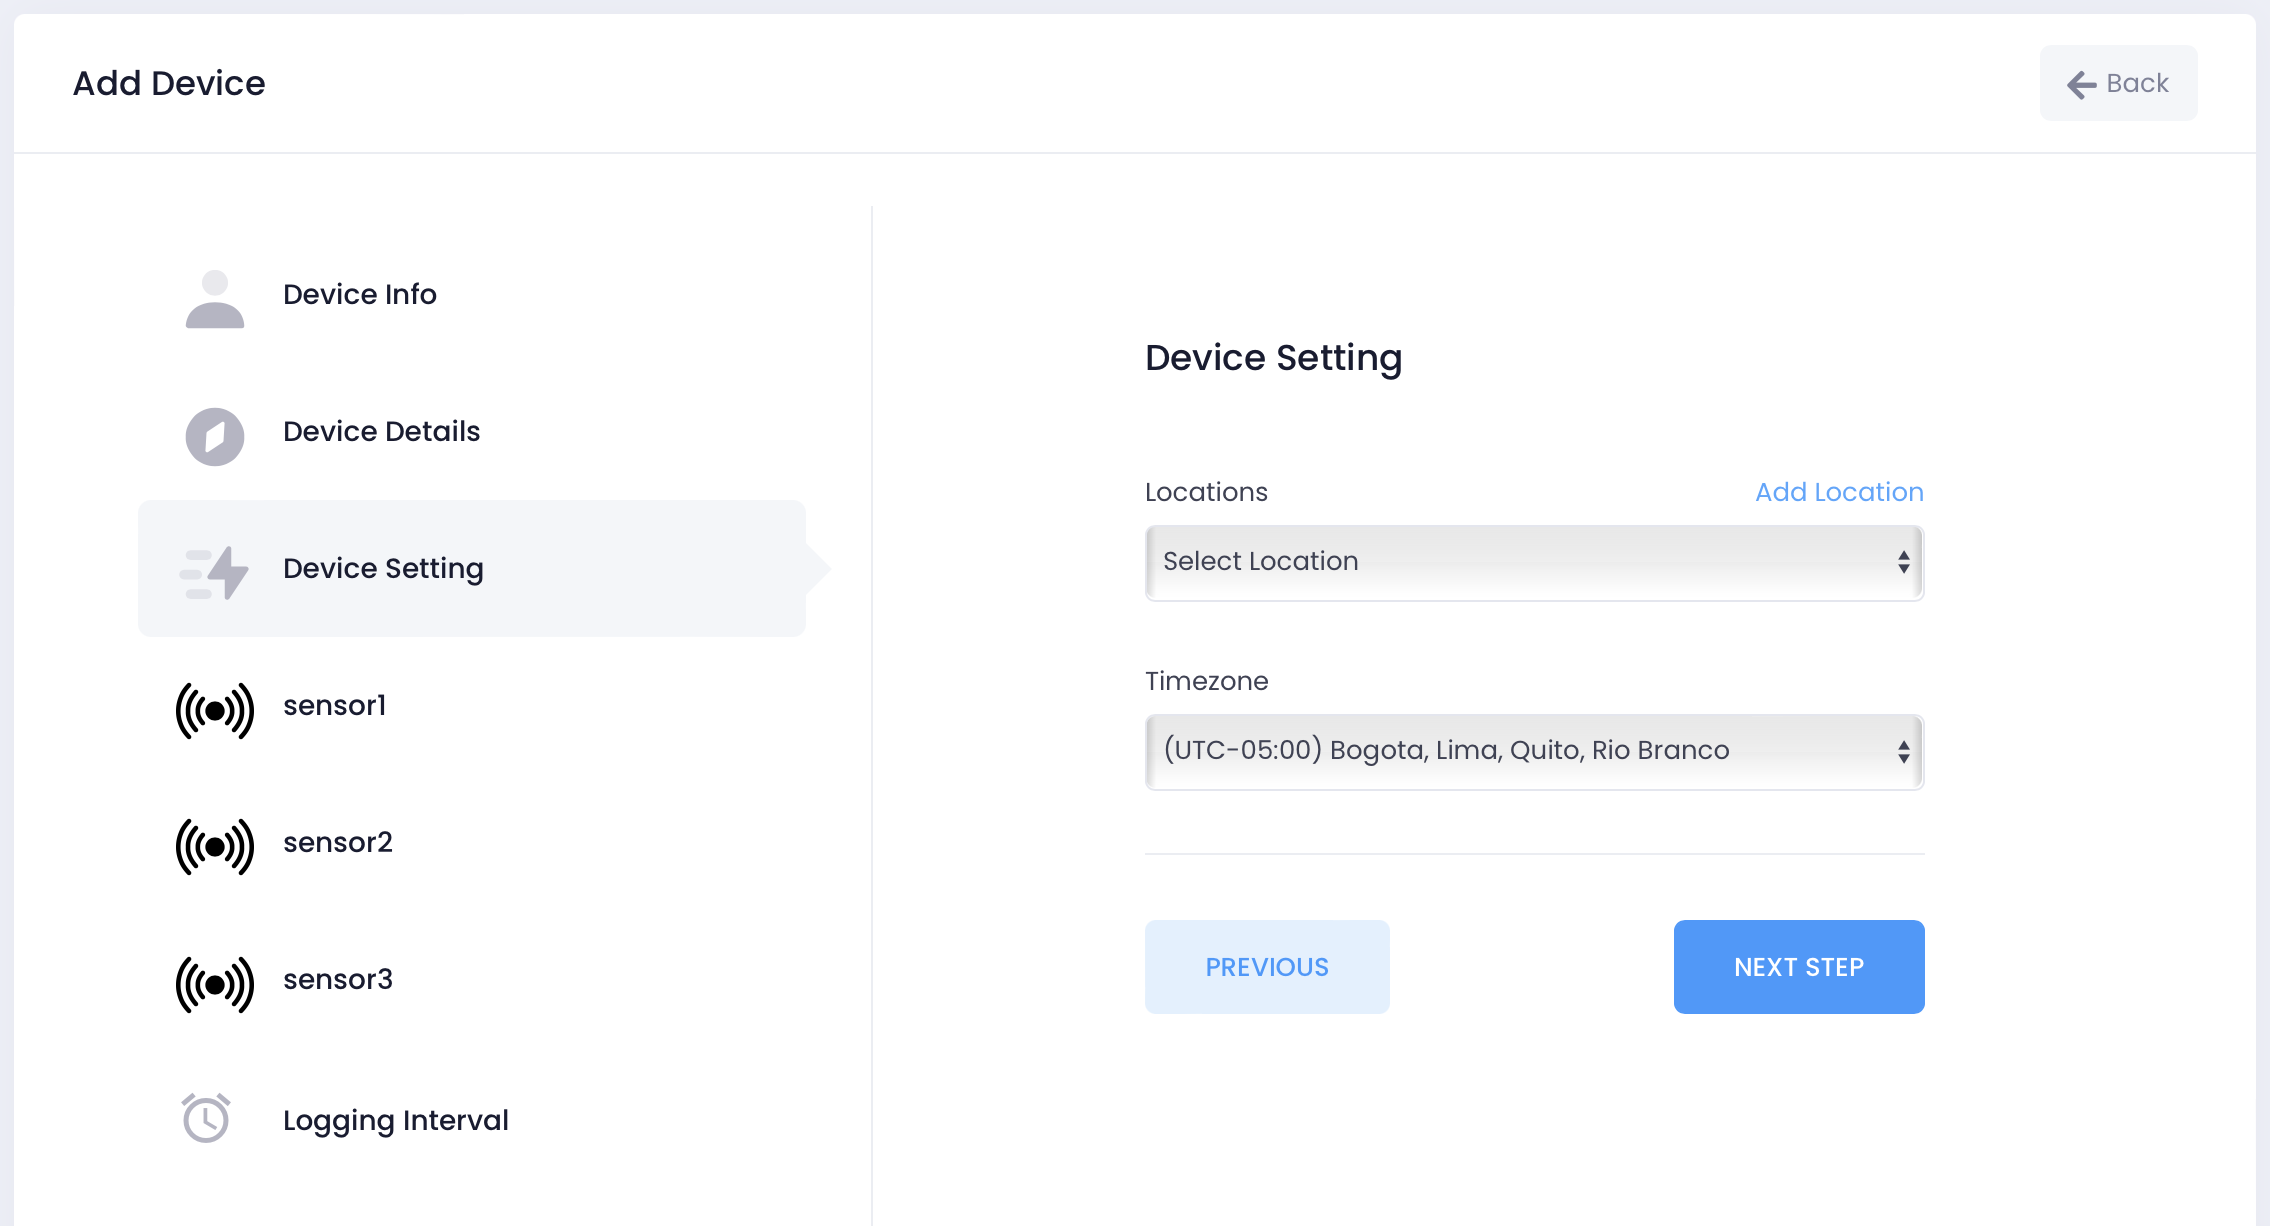
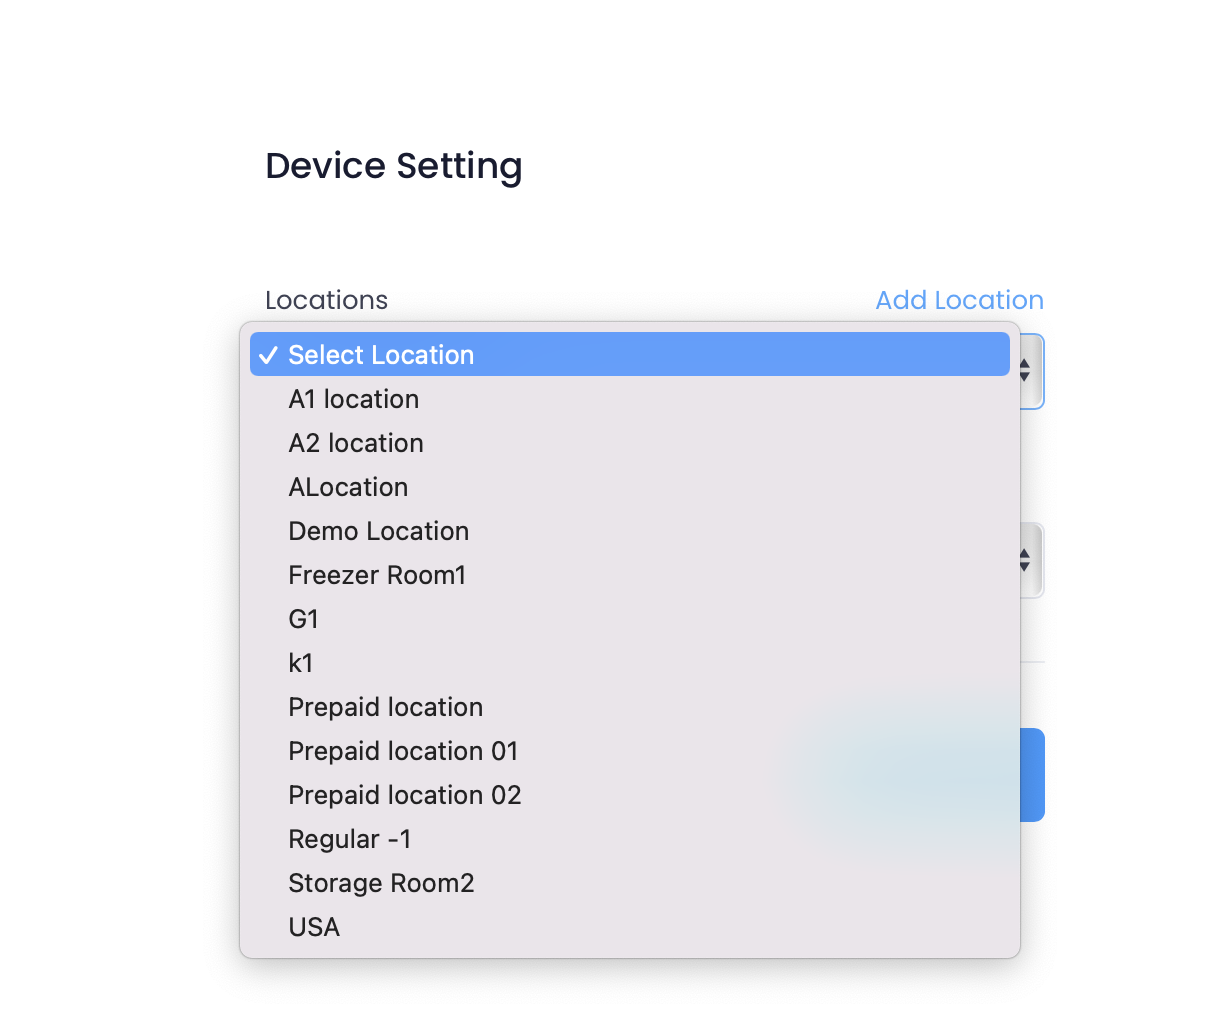
Use the Location turndown to assign the device to a location:
Use the Timezone turndown to set the required timezone that the device is physically located in:
.
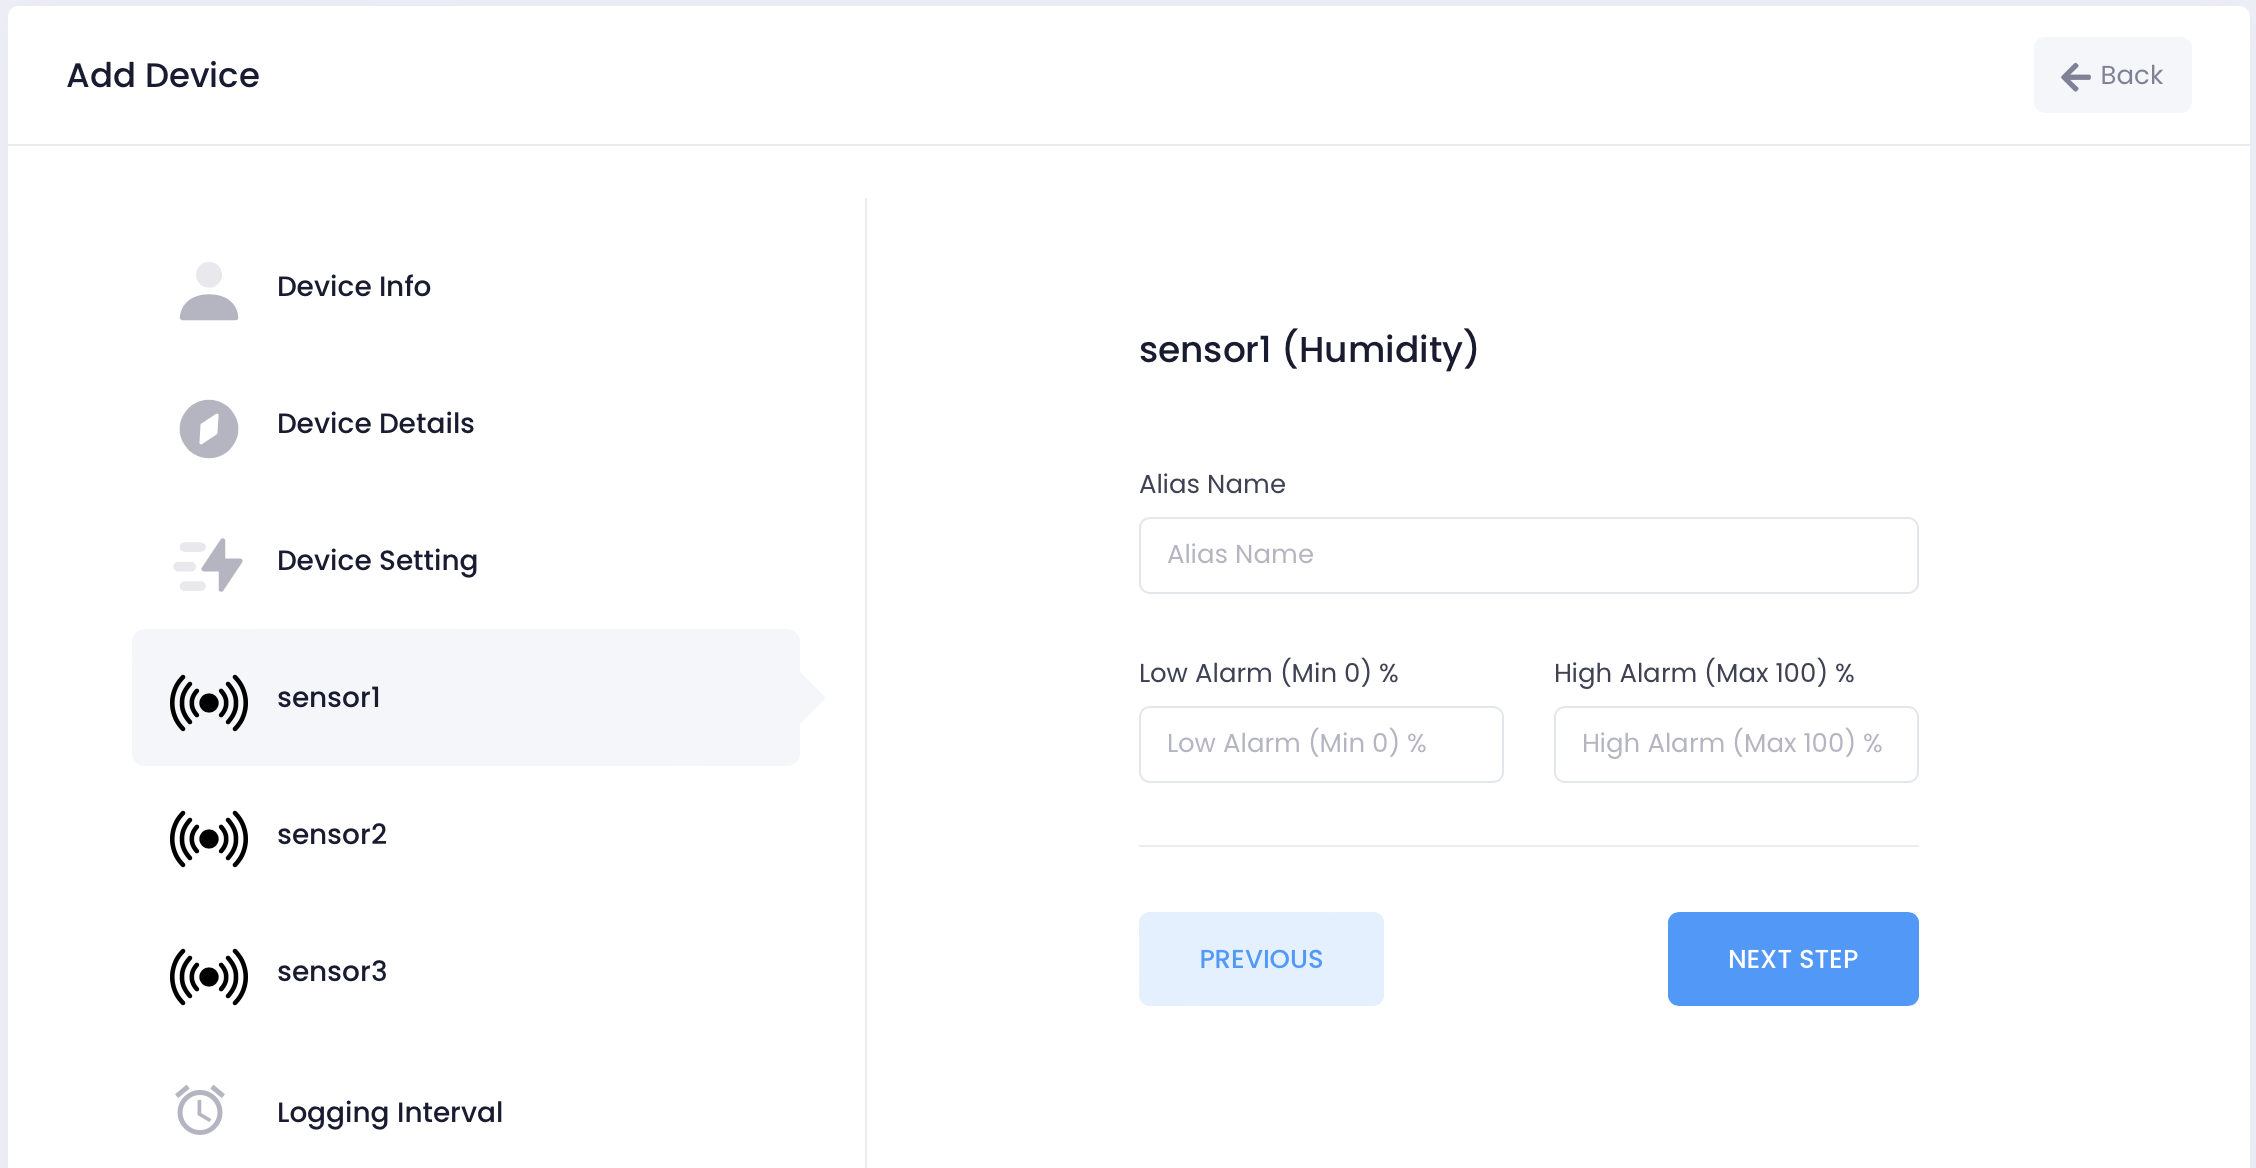
- Enter an optional Alias for the Channel. This provides a human readable name for the user.
- Enter the required Low Alarm value. If the device reading drops below this level a notification will be generated.
- Enter the required High Alarm value. If the device reading goes above this level a notification will be generated.
Select the Logging Interval. This is the frequency that the device will report readings to Device Cloud.
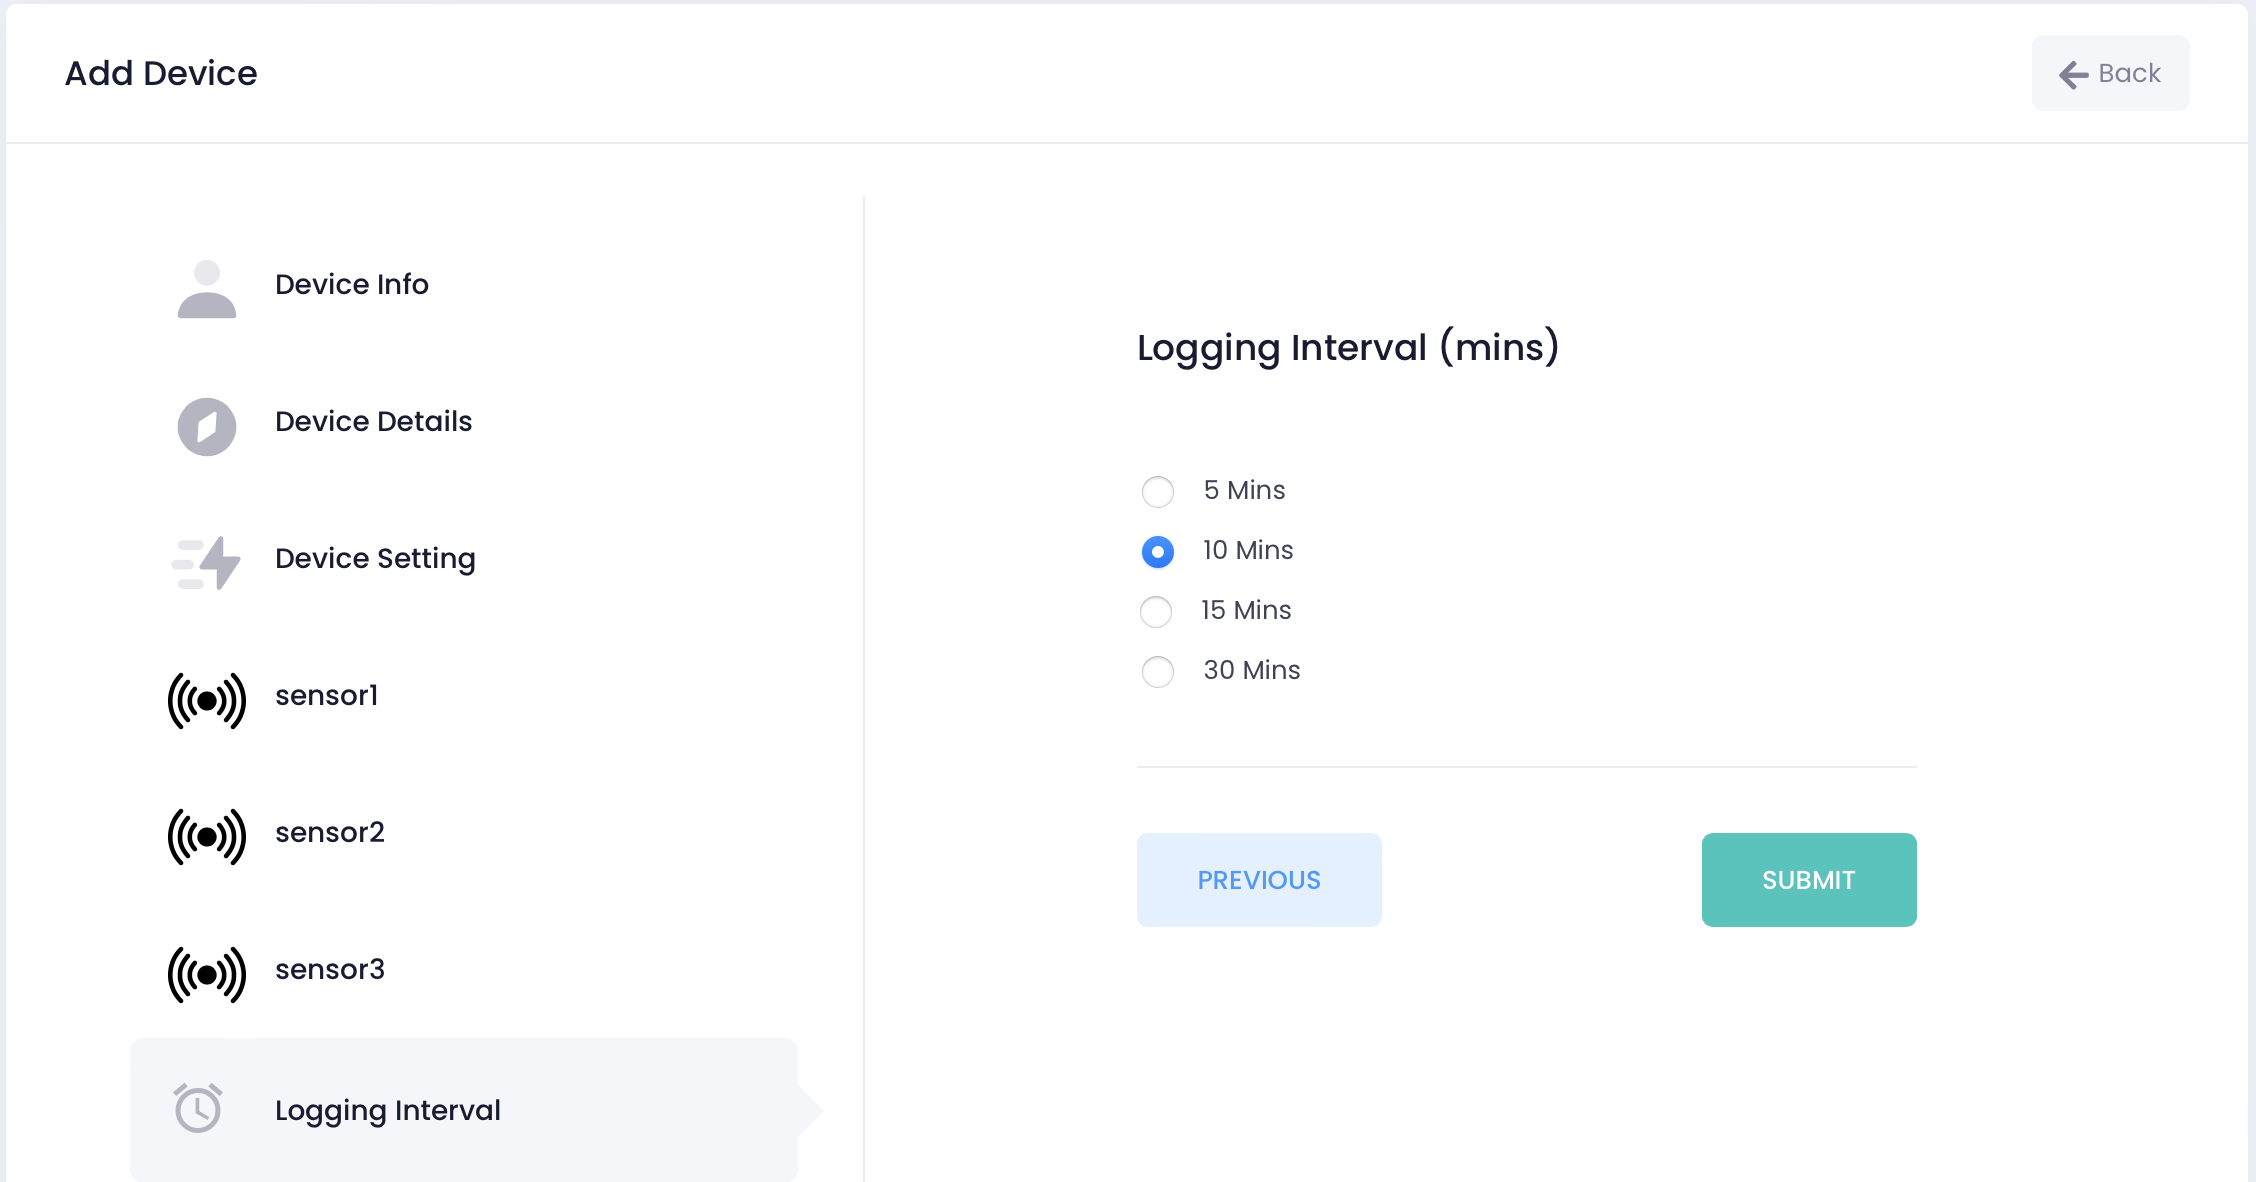
WARNING!
Lower reading intervals can affect battery life on battery operated TraceableLIVE® Datalogger devices.
With all of the information entered, tap the Add Device button and the new device will be added to your TraceableLIVE® account. You will be returned to the Devices screen.
Additionally, you can use the Back button to return to the previous screen. If the new device cannot be added, you will be informed of the issue.
Was this article helpful?